Combined Arms: Difference between revisions
mNo edit summary |
mNo edit summary |
||
| Line 1: | Line 1: | ||
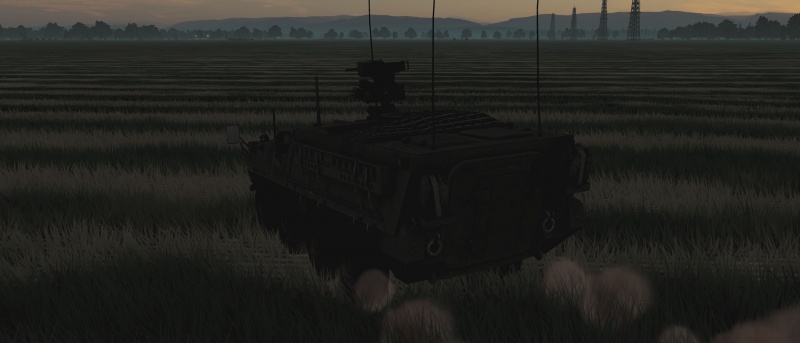
[[File:SneakyStryker.jpg|800px|frameless|Sneaky Stryker]] | [[File:SneakyStryker.jpg|800px|frameless|Sneaky Stryker]] | ||
{{RightImg| | {{RightImg|File:CA-DVD-cover-international_700x1000px.jpg}} | ||
[[File:CA icon.png|frameless|left]] | [[File:CA icon.png|frameless|left]] | ||
Revision as of 16:54, 11 July 2020
It is called Digital Combat Simulator — not Digital Flight Simulator — and this module allows for that distinction to make a small amount of sense. Combined Arms is (almost) all about commanding and controlling mobile ground units. The “almost” part comes in because, while that is the mainline feature, that command functionality also extends to AI aircraft.
Before anyone gets too excited and thinks that this offers tank simulation similar to DCS' aircraft sim modules: no. While there is a first-person view, Combined Arms does not offer any kind of actual “cockpit view” with instruments or advanced systems. It is simply a HUD overlay, possibly with some bits of vehicle showing if you look in the right direction, and the vehicles still use the same very basic hitpoint-based damage model that all ground units use.
In terms of actual gameplay, Combined Arms gives you access to a couple of new roles that mostly come into play in multiplayer, and to some optional additional functionality for pilots. Specifically, missions can assign the roles “Game Master,” “Tactical Commander,” “JTAC,” and “Observer” — the latter being somehow distinct from picking the observer coalition as opposed to the red or blue side. These roles simply offer different levels of control over ground units on the F10 map, along with different levels of map filtering:
- Game Masters can see and command all air and ground units on the map, and also directly control all mobile ground units.
- Tactical Commanders can command air and ground units for a specific coalition unless otherwise specified.
- JTACs can directly control ground units, but cannot issue commands to entire groups.
- Observers can see all units, but cannot command or control any of them.
In addition, mission designers can offer pilots the ability to command (and control) ground units at an access level similar to the Tactical Commander, and assign exactly which units can be controlled this way. This means leaving the aircraft to its own devices while the pilot fiddles with the F10 map, or abandoning it to AI control to go drive around in a ground vehicle instead. Thus, unless the aircraft has a sensible autopilot and/or proper waypoints set up for an AI to follow, using these options will often avoid in a loss of an aircraft.
Commanding ground units
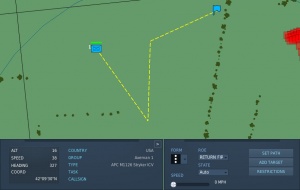
With Combined Arms installed, the F10 map gains a two more UI features: a tiny tank icon that lets you take direct control of certain vehicles, and a fold-out command tab connected to the usual information window. Besides location and unit data, this tab lets a commander set the formation, ROE, alert level, as well as setting routes and targets to attack.
In this as in some of the aspects of directly controlling ground units, it helps to have a basic understanding of how to set up units in the DCS Mission Editor since these options work the same way and use the same terminology.
Setting routes
Setting a route is a pretty simple and intuitive, but comes with a couple of quirks.
- LClick the “Set path” button.
- LClick a series of waypoints.
- RClick to set a final waypoint, and to complete and activate the route.
Red waypoints denote an off-road route will be taken. Successive waypoints placed on top of a road will have green markers, and the units will calculate a road path to follow between them. When travelling off-road, the group will try to maintain the assigned formation (“FORM” dropdown). Both on and off the road, individual units will prioritise maintaining formation over maintaining the set speed, but the group will pull ahead of a unit that is slowed down due to damage. Similarly, on the road, they will maintain their position in the queue, and the speed of the vehicle in front of them, unless the unit in front of them breaks down due to damage.
It should be noted that when driving on roads and around buildings, this means that entire groups can get stuck because a single units gets hung up on a turn or on the corner of a building. New manual routing (or better yet, direct control) will usually be needed to disentangle them from such a situation.
Setting targets
Like setting routes, setting targets is fairly simple but with a few quirks. The actual targeting is easy — just click “Add target” and then pick a target. The tricky part comes when it seems like the units are not firing, or when they just refuse to stop firing.
It is possible to queue up multiple targets by repeatedly picking Add target and picking a new unit to shoot at — the AI will try to engage and destroy those target in exactly that order. This means that, until an earlier target is dead, a later target in that list will not be engaged even if the former is parked in a bunker on the other side of the continent and the latter is sitting out in the open 10 meters away. At this point, one might want to remove a target from the list, which can be a bit finicky. If the “Remove target” button is showing, click it, then click the target to be removed from the list. If it is not showing, then first select the target to make the button appear, then click Remove and finally click the target again.
Even with everything set, the AI will often seem reluctant to engage unless and until the target is well within firing parameters, and what the AI considers those parameters to be is often a lot more restrictive than what a human would — doubly so if any actual restrictions have been set. That is just DCS being DCS.
Driving ground vehicles
Have you ever driven a vehicle in a Battlefield game? Congratulations: you now know how to drive in Combined Arms too. Mostly.
From the F10 map, select a unit and press the little tank icon at the top of the screen to jump into that vehicle (or press RAltJ).
Use WASD to accelerate, brake, and turn it around; X and Z to shift gears; and H to engage the hand brake. The mouse controls turret rotation and elevation (if it exists) — the relative position between turret and vehicle will be shown in the compass rose in the upper right corner. Most vehicles offer turret stabilisation if you press V, but at a cost of slightly reduced speed.
If a path is set, either using the command functions described above or set up beforehand through the mission editor, C engages the autopilot that follows the current route. Other units in the group can be controlled via the radio menu (default key \) and by pressing G and pick a spot for them to drive to.
Of note is the different view options available:
- F1 for turret view.
- LCtrlC for driver view.
- Ins for third-person (“Isometric”) view.
- B for Binocular/JTAC view.
As always, third-person is handy for getting a wider perspective on the surroundings, and it is particularly useful during reloads as it lets you look around even though the turret is usually locked in a loading position during that period. Third-person view also helps keeping track of airborn targets as they fly overhead — the regular turret view will be too zoomed in and too limited by traversal speed to keep up with fast-moving aircraft at high angles.
Targeting
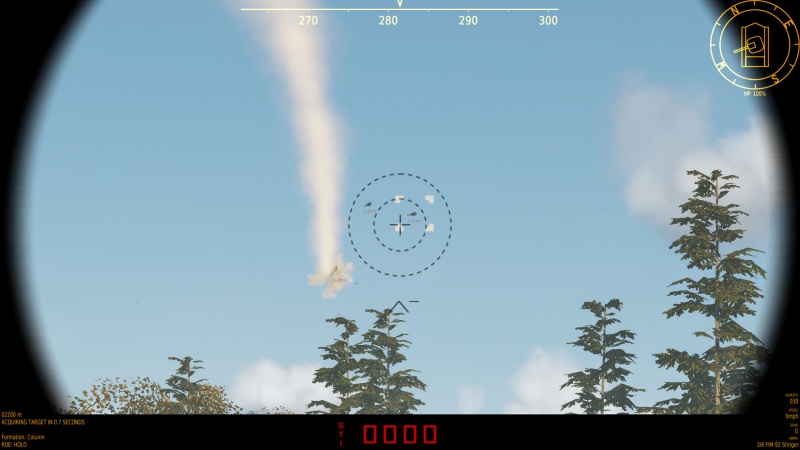
Targeting can almost always be done visually, but most vehicles and weapons also offer targeting assists or even outright lock-ons for guided weapons. For indirect/arcing-fire platforms like artillery, this is particularly useful — even necessary — at longer ranges. Select a weapon using the Q and E keys, and then simply put your crosshair over a target, press Enter. If it is within range, yellow targeting brackets will be shown while the correct firing solution is calculated.
Once done, the brackets turn red, and a circular targeting cue will appear to identify the correct elevation to hold in order to hit. Shift the crosshair to this point and fire. This also works for, for instance, radar-guided AAA gunnery and similar weapon systems.
For some weapons, such as laser- or wire-guided missiles, no elevation needs to be held. Instead, the targeting brackets simply signify that the target is within range and can be fired upon. For these weapons, the crosshair guides the missile in-flight and needs to be held on the target until impact.
Finally, some systems — in particular IR missiles — have automated lock-on and guidance mechanisms that work in a similar fashion. Commonly, these will begin the locking procedure on their own if a viable target is detected under the crosshair, and the target must then be tracked until the lock-on completes and the weapon can be fired.
Reloading, rearming, and warehouses
Sooner or later, you will run out of ammunition. Depending on what you are driving and shooting, this can happen in two different ways:
- The weapon has some kind of “magazine” and/or just loads a few rounds at a time, and has spare reloads in the boot. You have just run out and the ammo counter says “0 … Reloading required.”
- The weapon reloads from a continuous storage of some sort. You have just run out and the ammo counter says “Depleted.” This will also be displayed if you have run out of your last round of your last magazine.
In the first case, you need to reload. Press LCtrlR to start the process and LCtrlLShiftR to stop it if you suddenly need access to your weaponry again (your weapon will be left half-reloaded proportional to how much of the complete reload time has passed). The ammunition will be moved from storage to the active slots in the weapon/magazine.
In the second case, you need to rearm. This can only be done near a “warehouse” that provides the right type of ammunition. Most commonly, warehouses exist at airports and rearming can be done when within 2km of the map symbol of the airport. Look for the little bomb-in-a-square icon over certain buildings near the airport to see if and where there warehouses are. Mission builders can also place free-standing warehouses anywhere on the map, and they will show up with the same symbol. Finally, lorry units — most commonly the M818 and Ural 375 — act as mobile ammunition warehouses for ground units. When within 200m of any of these, rearming can be done.
To rearm, press LAlt\ to start the process — here too, LCtrlLShiftR can be used to interrupt the rearming, but note that the rearming starts for all weapons the vehicle is carrying and the rearming process needs to be interrupted individually for each and every one of them. Again, use Q and E to cycle through the weapons to see which one is holding everything up.
During both reloading and rearming, weapons will be unavailable and any turrets will be angled off in a reload position. You can move while doing either, but that will interrupt the process, so don't unless it is absolutely necessary. You can still look around (especially if using Ins third-person view) or use external views to see what else is going on, but note that changing vehicles while in the middle of reloading or rearming will break the process. If you need to swap vehicles, make sure to cancel any ammunition maintenance before doing so.
Playing as JTAC
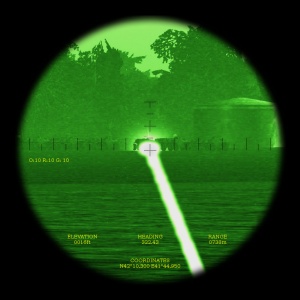
Almost any unit can be used as JTAC when driven by a Combined Arms player. Just take direct control of a vehicle and press B to pull out your trusty binocular/spotting scope. The most relevant controls are shown on-screen and are very straight-forward. The only thing that is really missing is that RAltN reduces NVG brightness and RCtrlN increases it, and that you can zoom in and out with your scroll wheel. This is important to know because chances are that you will want to use, not just the laser to illuminate a target, but also the IR pointer to see clearly where you are actually aiming.
The main problem with ground-unit JTAC is that they sit at a low angle above the ground, and the laser in DCS does not actually bounce off units — only off the ground. At a low angle, not only is it likely that you are intuitively pointing at the vehicle rather than the ground beneath it, but even if you try to aim for the ground, you are very likely aiming short or long. This can be avoided by trying to ensure that you are always aiming down from a hillside or mountain or any other elevated position. You can also use the IR pointer as a visual aid to see exactly what is being lased. It will only show up in the NVG scope (N key), and it can be used during the day if the NVG brightness is turned all the way down.
With the aiming done, communicate with CAS to set the correct laser code with the C key, and press L to start lasing. And do not move around — hands off both the mouse and the keyboard. Unfortunately, you do not have any proper EPRLS or other advanced messaging system to automatically deliver coordinates to an A-10C or Ka-50. You just have to tell them manually based on what the scope is saying. Note that, just like on the map, you can use LAltY to change coordinate system to whatever the other party prefers.
Links and files
- DCS: Combined Arms in the DCS shop.
Related DCS modules
- Combined Arms: Frontlines Georgia Campaign.
| DCS World | |
|---|---|
| Add‑on modules |
Combined Arms · NS 430 Navigation system · Supercarrier · WWII Assets Pack |


